算法

目前还是挺难把这个想清楚的 - 19.11.5

TODO 确定结构

算法相关的汇总篇章, 从学习方法与原理到算法分类甚至书籍阅读都会在这里编写

想要提升能力, 必不可少的是刻意练习, 想提升哪方面就练习, 总结该方面
注意, 必须一个连续的时间沉下心写算法练习题, 总结, 并且形成自己的知识体系和理解(也就是下方的总结),并以此为树干, 逐渐深入到达树叶
学习算法, 应该先学好逻辑过程, 用抽象的伪代码, 不涉及语言, 再用一门语言实现它, 在实力不强的时候边学边写, 上网参考最佳实践, 不要纠结是否独立完成

所想及能写

能将所想的翻译成代码, 最基础的要求, 需要在编程语言入门时就完成

基础知识积累

这一方面需要的是数据结构, 如链表, 树, 堆等

直接与底层实现打交道的, link, tree, heap
抽象一层的, stack, queue, prior queue

bug free

循环不变量, 和特例输入

常见算法设计

动态规划, 分治, 贪心, 回溯, 分支限界

实现(老实说, 水平有点绿色, 就交给以后的我吧)

根据论文, 需求将代码实现

尝试

结论, 没有系统的详细的深入总结总是感觉发虚!!
用英文只是为了显得比较帅, 毕竟只有我自己看, 不用考虑其他人 (:з」∠)\

  1. Book: Learning JavaScript Data Structures and Algorithms
  2. OJ: JavaScript codewars kata 4
  3. Book: algorithm ( the 4th edition )
  4. Curriculum: datastructure class in school
  5. Curriculum: JavaScript Algorithms and Data Structures Certification
  6. OJ: JavaScript LeetCode 40+
  7. OJ: python LeetCode 40+
  8. OJ: python ccf 得了 250, 希望 20 年三月能超过 350

文件上传与小应用

效果

原生, 没有package.json

将图片文件上传到电脑上, 项目地址

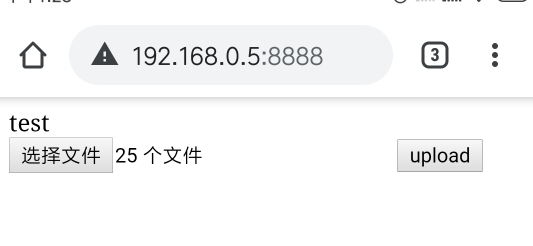
上传25张

前端显示

后端显示

之后用这个上传了几百张, 超喜欢的图嘿嘿😆

文件上传

平时会碰到上传文件或者用浏览器处理文件等情况, 所以从前后端来写各自的原理与解决方法。

后端的上传处理 - nodejs

原生的

从 nodejs 原生说起

详细可以阅读 http:文件上传背后发生了什么?

  1. 服务器接收到文件数据, 下文的 req 便是 http.createSever(function(req, res) {}) 里往匿名回调中传入的参数
1
2
3
4
5
req.on('data', function(chunk) {
console.log(chunk)
body += chunk;
}); //目测是按 ascii 输出, 因为没有出现中文乱码 Эg0RÇÄ+ÓG\I.PÒUeOÓZáQµ(Wk
// 当然 每次在 data 事件中触发抓获的数据块是一个 Buffer 或 string, http.incomingMessage 继承了 stream, 这里是 string, 可以用 typeof 看

post数据的传输是可能分包的,因此采用监听方式
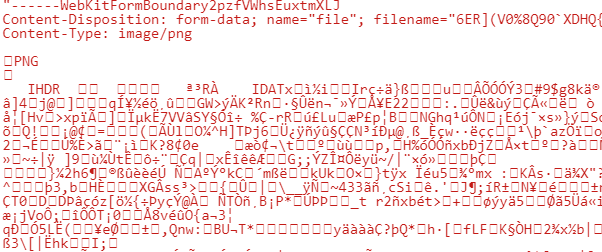
使用 node –inspect 查看的内容如下

chunk 内容

  1. 对数据进行处理
  1. 将请求报文转为对象
  2. 判断图片文件, 提取信息
  3. 获取文件二进制数据
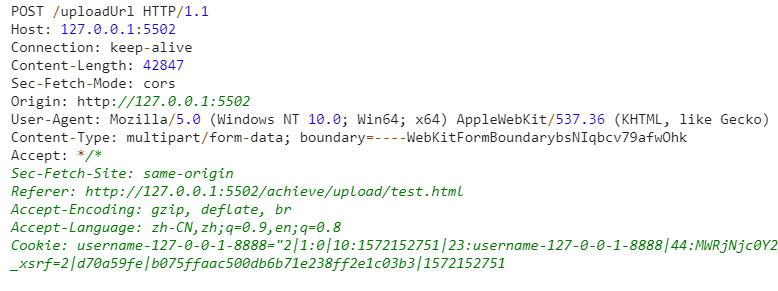
    http 请求报文结构为: 请求行(request line)、消息头部(header) 、空行(CRLF) 、请求正文, 详细了解 HTTP消息
    http 报文内容

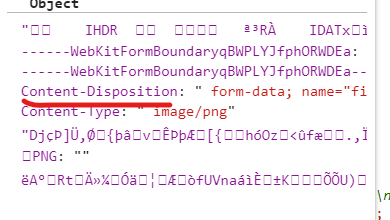
使用 querystring.parse 获取信息

解析出来的 file 对象

1
2
3
4
5
6
7
8
9
10
11
12
13
14
15
16
17
18
19
20
21
22
23
24
25
26
27
28
29
30
31
32
33
34
35
36
req.on('end', function() {
var file = querystring.parse(body, '\r\n', ':');
// console.log(file);将整个 Http 请求报文解析为一个对象

// 只处理图片文件
if (file['Content-Type'].indexOf('image') !== -1) {
//获取文件名
var fileInfo = file['Content-Disposition'].split('; ');
for (value in fileInfo) {
if (fileInfo[value].indexOf('filename=') != -1) {
fileName = fileInfo[value].substring(10, fileInfo[value].length - 1);

if (fileName.indexOf('\\') != -1) {
fileName = fileName.substring(fileName.lastIndexOf('\\') + 1);
}
// console.log('文件名: ' + fileName);
}
}

// 获取图片类型(如:image/gif 或 image/png))
var entireData = body.toString(),
contentType = file['Content-Type'].substring(1);

//获取文件二进制数据开始位置,即contentType的结尾
var upperBoundary = entireData.indexOf(contentType) + contentType.length;
var shorterData = entireData.substring(upperBoundary);

// 替换开始位置的空格
var binaryDataAlmost = shorterData.replace(/^\s\s*/, '').replace(/\s\s*$/, '');

// 去除数据末尾的额外数据,即: "--"+ boundary + "--"
var binaryData = binaryDataAlmost.substring(
0,
binaryDataAlmost.indexOf('--' + boundary + '--')
);
}

http 上传文件, 实际上是由协议 RFC1867 对 form 表单扩展而来的, 如果有兴趣模拟 http 上传文件, 可以看这篇文章, 作者用的是 c# - 模拟HTML表单上传文件(RFC 1867)

  1. 将数据写入文件
1
2
3
4
5
6
7
fs.writeFile('./image/' + fileName, binaryData, 'binary', function(err) {
// res.writeHead(302, {
// Location: '/' 文件的写入需要buffer类型的数据
// });
res.writeHead(200); //没写end导致变成了持久连接
res.end('123');
});

如果只接收信息不返回的话, 会成为持续连接, 由于浏览器对连接数有最大限制, 所以会出现同时上传文件超过6个很慢的 bug 原文出处 - Max parallel http connections in a browser?

框架的

将来用到再说, 除了原理或者有趣的东西, api 调用什么的是不会调查的, 当然用过的话会写就是了

前端

首先, 上传文件肯定用的是 post , 因为 get 传参放在 url 里有最大值, 而 post 放在 request.body 中没有限制。

form enctype

首先说明一下 enctype, 用来指示 form 数据形式, 它可以有三种值:

  1. application/x-www-form-urlencoded 正常形式
  2. multipart/form-data 用来传文件
  3. text/plain 不用管

其中 application/x-www-form-urlencoded 是在 headers 部分添加 Entity headers (如果请求中没有 body,则不会包含。), body 是正常 url 编码的值 传达的形式如下:

1
2
3
4
5
6
POST / HTTP/1.1
[[ Less interesting headers ... ]]
Content-Type: application/x-www-form-urlencoded
Content-Length: 51

text1=text+default&text2=a%CF%89b&file1=a.txt&file2=a.html&file3=binary

而 multipart/form-data 则会在添加 boundary 来区分, 并在最后的 boundary 添加两个连号代表结尾

1
2
3
4
5
6
7
8
9
10
11
12
13
14
15
16
17
18
19
20
21
POST / HTTP/1.1
[[ Less interesting headers ... ]]
Content-Type: multipart/form-data; boundary=---------------------------735323031399963166993862150

-----------------------------735323031399963166993862150
Content-Disposition: form-data; name="text1"

text default
-----------------------------735323031399963166993862150
Content-Disposition: form-data; name="file1"; filename="a.txt"
Content-Type: text/plain

Content of a.txt.

-----------------------------735323031399963166993862150
Content-Disposition: form-data; name="file2"; filename="a.html"
Content-Type: text/html

<!DOCTYPE html><title>Content of a.html.</title>

-----------------------------735323031399963166993862150--

详细可以看这里 What does enctype=’multipart/form-data’ mean?

历史演变

submit form -> XMLHttpRequest form

form 直接 submit

  1. form 提交会默认跳转新页面, 默认使用 GET, 如果用 POST, 那么请求报文中的 content-type 默认为 x-www-form-urlencoded
  2. 提交需要使用设置了 type=”submit” <input><button> 当然 js 也可以

详细提交方式可以看 - form表单提交方式

另外插件 jquery.form.js 不跳转上传, 原理为: ajax + 取消默认事件如果不支持 XMLHttpRequest 2级使用 target + iframe

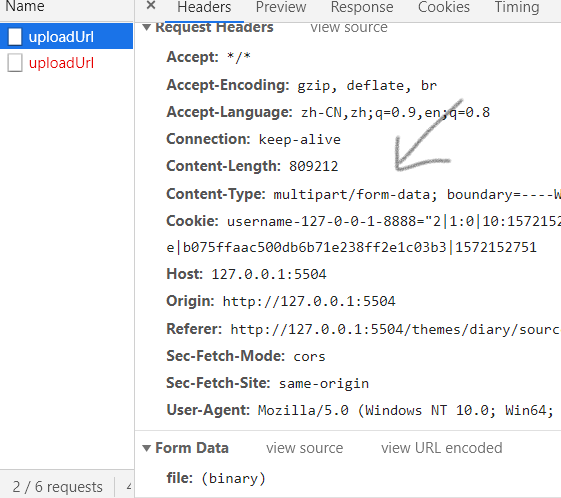
由于懒, 不想用 postman 之类的, 直接用 node 来看请求报文, 使用 nodejs 监听源自本机上所有的访问次端口的请求, 并打印请求中的信息, 原文来自 - HTTP test server accepting GET/POST requests

ajax 上传

到了 ajax 的时候, 可以用 FormData 对象管理表单数据, FormData 类型其实是在 XMLHttpRequest 2级定义的, 可以利用 HTMLFormElement 对象初始化来获得与表单相同的值, 相比一个个获取表单值再上传方便

1
2
3
4
5
6
7
var req = new XMLHttpRequest();
req.open('post', '/uploadUrl');
var test = new FormData()
test.append("k1", "v1");
req.send(test); //自动设置 content-type: multipart/form-data
req.open('post', '/uploadUrl');
req.send(123) //text/plain

content-type 自动设置

FormData 会自动在上传的时候设置 content-type, 原文来自 - axios的content-type是自动设置的吗?

应用

最后来写下我的应用:

场景: 手机上有很多好看的图片, 但是我平时欣赏图片一般是电脑上, 所以想把图片传上来
方案: 手机 usb 连电脑, 手机浏览器上传
优缺点分析: usb 连接慢, 并且图片分散在不同文件夹

应该够清楚了吧, 接下来贴代码啦

1
2
3
4
5
6
7
8
9
10
11
12
13
14
15
16
17
18
19
20
21
22
23
24
25
26
27
28
29
30
31
32
33
34
35
36
37
38
39
40
41
42
43
44
45
46
47
48
49
50
51
52
53
54
55
56
57
58
59
60
61
62
63
64
65
66
67
68
69
70
71
72
73
74
75
76
77
78
79
80
81
82
83
84
85
86
87
//node环境 文件名 uploadUrl.js
var http = require('http');
var fs = require('fs');
var querystring = require('querystring');

const portal = 8888;
console.log(`服务开始,打开localhost:${portal}即可访问`);
http
.createServer(function(req, res) {
var arg = req.url;
if (arg === '/uploadUrl') {
console.log('上传文件服务');
parseFile(req, res);
} else {
fs.readFile('./test.html', 'utf-8', function(err, data) {
//读取内容
if (err) throw err;
res.writeHead(200, { 'Content-Type': 'text/html' }); //注意这里
res.write(data);
res.end();
});
}
})
.listen(portal);

function parseFile(req, res) {
req.setEncoding('binary');
var body = ''; // 文件数据
var fileName = ''; // 文件名
// 边界字符串
// console.log(req.headers['content-type'] + '\n\n\n\n\n\n\n');
var boundary = req.headers['content-type'].split('; ')[1].replace('boundary=', '');
req.on('data', function(chunk) {
console.log(typeof chunk);
body += chunk;
});
req.on('end', function() {
var file = querystring.parse(body, '\r\n', ':');
// console.log(file);

// 只处理图片文件
if (file['Content-Type'].indexOf('image') !== -1) {
//获取文件名
var fileInfo = file['Content-Disposition'].split('; ');
for (value in fileInfo) {
if (fileInfo[value].indexOf('filename=') != -1) {
fileName = fileInfo[value].substring(10, fileInfo[value].length - 1);

if (fileName.indexOf('\\') != -1) {
fileName = fileName.substring(fileName.lastIndexOf('\\') + 1);
}
// console.log('文件名: ' + fileName);
}
}

// 获取图片类型(如:image/gif 或 image/png))
var entireData = body.toString(),
contentType = file['Content-Type'].substring(1);

//获取文件二进制数据开始位置,即contentType的结尾
var upperBoundary = entireData.indexOf(contentType) + contentType.length;
var shorterData = entireData.substring(upperBoundary);

// 替换开始位置的空格
var binaryDataAlmost = shorterData.replace(/^\s\s*/, '').replace(/\s\s*$/, '');

// 去除数据末尾的额外数据,即: "--"+ boundary + "--"
var binaryData = binaryDataAlmost.substring(
0,
binaryDataAlmost.indexOf('--' + boundary + '--')
);
// 保存文件
// res.write('<head><meta charset="utf-8"/></head>');
// res.end('123');
fs.writeFile('./image/' + fileName, binaryData, 'binary', function(err) {
// res.writeHead(302, {
// Location: '/'
// //add other headers here...
// });
res.writeHead(200); //原来没写end导致变成了持久连接
res.end('123');
});
} else {
res.end('just pic allowed');
}
});
}
1
2
3
4
5
6
7
8
9
10
11
12
13
14
15
16
17
18
19
20
21
22
23
24
25
26
27
28
29
30
31
32
33
34
35
36
37
38
39
40
41
42
43
44
45
<!-- 文件名 test.html -->
<form id="form" action="/uploadUrl" enctype="multipart/form-data" method="post">
<input type="file" name="upload" multiple />
<input type="button" value="upload" onclick="handler(this)" />
</form>
<script>
var files;
function handler(e) {
var trueForm = document.getElementById('form');
var form = new FormData(trueForm);
files = form.getAll('upload'); //利用只读 formdata 获得全部文件信息
iterate(0);
}
function iterate(num) {
Promise.all(
//6 的原因是同时存在的连接最大数
files.slice(num, num + 6).map(
(i) =>
new Promise((res, rej) => {
upload(i, res);
})//这里没有大括号, 依据箭头函数是直接返回的, 注意 Promise.all 的使用
)
)
.then((result) => {
if (num >= files.length - 6) return;
iterate(num + 6);
})
.catch((result) => {
if (num >= files.length - 6) return;
iterate(num + 6);
});
}
function upload(i, res) {
var temForm = new FormData();
temForm.append('file', i);
var req = new XMLHttpRequest();
req.onreadystatechange = function() {
if (req.status == 200) {
res(); // 更改 Promise 状态
}
};
req.open('post', '/uploadUrl');
req.send(temForm);
}
</script>

参考文章:


promise-await-yield 异步三连

JavaScript 中使用异步的情况非常多, 因为 js 采取单线程, 如果某段代码处理时间过长, 后面的代码将一直等待其执行完毕。
由此产生的处理方案是, 任务队列与事件循环(event loop), 无论是最初的回调函数(并非只用在异步), 还是后面解决 callback hell 而出现的 promise 等, 都是依靠在这个机制上的。

主线程遇到异步函数时, 将其扔给异步模块, 继续执行主线程中剩下的部分, 当异步函数满足了执行要求时, 将回调函数放入任务队列中, 主线程完成后, 才会从任务队列中选择任务执行, 而 event loop 负责的是不断从任务队列中取代码, 详细请看 - JavaScript 异步、栈、事件循环、任务队列

历史演变情况

易嵌套的 callback -> promise -> 包装 promise 的 generator -> generator 的语法糖 await

promise

基础概念

JS里一个promise可以有以下几种基本状态:
1.nothing happened yet
2."locked in" to another promise
3.fulfilled
4.rejected
其中{1,2}为pending,{3,4}为settled,{2,3,4}为resolved,{1}为unresolved。详细可以看 Promise的fulfill和resolve

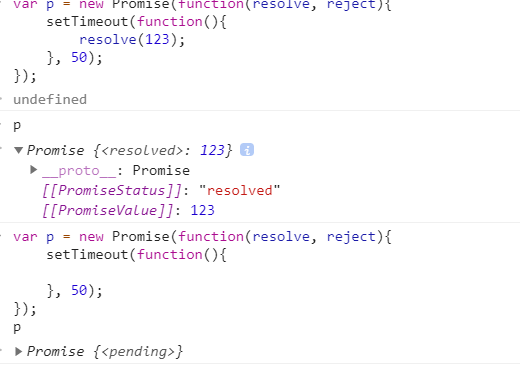
Promise 对象用于表示一个异步操作的最终完成 (或失败), 及其结果值。Promise 的参数 executor 函数在 Promise 构造函数返回所建 Promise 实例对象前被调用, 当异步成功完成并调用 resolve 函数时, 将会将 Promise 的状态 [[PromiseState]] 更改为 fulfilled (chrome 中是 resolved), 如果没有调用 resolve 将一直是 pending 状态
Promise 状态
结果值 是 Promise 内置伪属性 internal slots [[PromiseValue]] (chrome devtool 将它暴露出来了), 它将作为参数传入 之后 then 的参数 onFulfilled 或 onRejected 中

基础使用

下方新构建一个 Promise 的对象, 当执行到 resolve 时, 将 [[PromiseState]] 改为 fulfilled, 当 Promise 变成接受状态(fulfilled)时调用 then 中的 onFulfilled。onFulfilled 有一个参数,即接受的最终结果

1
2
3
4
5
6
7
var p = new Promise(function(resolve, reject){
setTimeout(function(){
resolve(123);
}, 50);
});
p.`then`((data)=>console.log(data))
console.log(p)

then

每次调用 then 后都会返回一个 promise 对象, 返回的情况由 then 中的回调决定, 描述一些常用的情况

  1. 返回了一个值, 那么 then 返回的 Promise 将会是 fulfilled 并且将返回的值作为下一个 then 的 onFulfilled 的参数
  2. 返回一个未定状态(pending)的 Promise,那么 then 返回 Promise 的状态也是未定的, 并且状态与该 Promise 保持一致, 并依据该 Promise 中的 resolve 和 reject 来使用下一个 then 的两个参数

    详细情况请看 Promise.prototype.then()

    1
    2
    3
    4
    5
    6
    7
    8
    9
    10
    var p = new Promise((resolve, reject) => {
    setTimeout(() => {
    resolve(123)
    }, 1000)
    })
    p.then(res => {
    return '456'
    }).then(res => {
    console.log(res) //打印 456
    })

简单 Promise 实现

当然这都是口头上的执行流程, 现在来写一个看看

  1. 结构

    1
    2
    3
    4
    class promise{
    constructor(){}
    then(){}
    }
  2. 构造函数

    !!!! 如果不将 then 中的 onFulfilled 函数使用setTimeout 推迟到下个事件循环再执行, 执行顺序会与原生Promise不同

    1
    2
    3
    4
    5
    6
    7
    8
    9
    10
    11
    12
    13
    14
    15
    16
    17
    18
    19
    20
    21
    22
    23
    24
    constructor(executor){
    //初始状态
    this._states = 'pending';
    this._internalValue = undefined;
    // 添加回调函数队列
    this._chain = []
    const resolve = (res)=>{
    this._states = 'fulfilled';
    this._internalValue = res;
    //如果此时已经有 then 被调用了
    for(var {onFulfilled} of this._chain){
    //对象结构赋值, chain 中元素都是对象
    setTimeout(() => onFulfilled(res), 0);
    }
    }
    const reject = (err)=>{
    this._states = 'rejected';
    this._internalValue = err;
    for(var {onRejected} of this._chain){
    setTimeout(() => onRejected(res), 0);
    }
    }
    executor(resolve, reject);
    }
  3. then 函数编写

    如果已经 settled 那就执行, 否则加入执行队列

    1
    2
    3
    4
    5
    6
    7
    8
    9
    then(onFulfilled, onRejected) {
    if (this._states === 'fulfilled') {
    onFulfilled(this._internalValue)
    } else if (this._state === 'rejected') {
    onRejected(this._internalValue)
    } else {
    this._chain.push({ onFulfilled, onRejected })
    }
    }
  4. Promise 调用链

    then() 应该返回一个新 Promise

    1
    2
    3
    4
    5
    6
    7
    8
    9
    10
    11
    12
    13
    14
    15
    16
    17
    18
    19
    20
    then(onFulfilled, onRejected) {
    var self = this
    return new promise((resolve, reject) => {
    // 确保在 onFulfilled() 和 onRejected() 的错误将导致返回的 promise 失败(reject)
    const _onFulfilled = (res) => {
    resolve(onFulfilled(res));
    };
    const _onRejected = (err) => {
    reject(onRejected(err));
    };
    console.log(self === this) //。。。。
    if (this._state === 'fulfilled') {
    _onFulfilled(this._internalValue);
    } else if (this._state === 'rejected') {
    _onRejected(this._internalValue);
    } else {
    this._chian.push({ onFulfilled: _onFulfilled, onRejected: _onRejected });
    }
    });
    }

onFulfilled() 返回 Promise 的话

1
2
3
4
5
6
7
8
9
10
11
12
13
14
15
16
17
const resolve = res => {
if (this._state !== 'pending') {
return
}
// 如果 res 是 thenable(带有then方法的对象, 如 Promise)
// 必须判断 res 不是null 或 undefined 否则跳到 reject 去处理了
if (res&&typeof res.then === 'function') {
return res.then(resolve, reject)
}

this._state = 'fulfilled'
this._internalValue = res
for (const { onFulfilled } of this._chain) {
setTimeout(() => onFulfilled(res), 0);
}
return res
}

!!!! 建议写一段代码, 在脑海中运行一遍, debug 也可以, 实在不行纸上写一遍流程(最佳方案), 这玩意调用来调用去, 脑袋都绕晕了, 可以在下方看看测试对比, 输出可以点击网站左下角的 console 按钮看到

### generator (可能搭在await里) ### await (待写-水平还要再高点, Promise 就够吃力了, 肯定会补的)

参考文章:
Write Your Own Node.js Promise Library from Scratch

Promise


软件开发 设计模式

纲要

  1. 部分设计模式是为了弥补静态类型中难以实现某些代码(功能复用)而存在的
  2. 动态类型语言很大部分不需要
  3. 设计模式是将达成软件复用等需求的惯用法抽象而成的
  4. 有总结设计模式的套路

那么, 为什么动态类型会不需要这些设计模式:

收集总结

包装

将某个核心方法进行包装, 实现多个功能


jquery 学习思考-扩展

需求, 能够选中日期然后返回字段。另外, 设计页面时遵循:

  1. 基础事件所需要的界面
  2. 自己作为用户确认是否继续添加交互
  3. 根据 2 回到 1 或结束

    date picker 来源

    来源是这个网站

界面构建阶段

首先先写好界面, 然后保证结构不变添加事件, 再依次完善事件界面
完成界面, 完完整整根据设计图来就行

为了省事大部分css与原网址一致, 注意此阶段写死了参数, 后面js动态生成时会更改

input 输入框

用最常见的样式, 这是在网上找到的, 其动态效果的触发为 :placeholder-shown, hover, focus ,属性为 transform 中的 translate, scale, transform-origin。控制为 transition
触发含义: placeholder(占位符)是否展示。
属性含义: 移动, 缩放, 动画效果起始点。
input输入框

原网址用的 stylus css预处理器, 可以通过css框的右上角的箭头 选择 view compiled css 看处理后的 css

1
2
3
4
5
6
7
8
9
10
11
12
13
14
15
16
17
18
19
20
21
22
23
24
25
26
27
28
29
30
31
32
33
34
35
36
37
38
39
40
41
42
43
44
45
46
47
48
49
50
51
52
53
54
55
56
57
58
59
60
61
62
63
64
65
66
67
68
69
70
<style>
#inp {
cursor: pointer;
width: 100%;
border: 0;
padding: 12px 0;
height: 48px;
font-size: 18px;
font-weight: 500;
border-bottom: 2px solid #c8ccd4;
border-radius: 0;
color: #223254;
transition: all 0.15s ease;
}
#inp:hover {
background: rgba(34, 50, 84, 0.03);
}
#inp:not(:placeholder-shown) + span {
color: #5a667f;
transform: translateY(-26px) scale(0.75);
}
#inp:focus {
background: none;
outline: none;
}
#inp:focus + span {
color: #07f;
transform: translateY(-26px) scale(0.75);
}
#inp:focus + span + .border {
transform: scaleX(1);
}
.inp {
position: relative;
top: 50px;
margin: auto;
width: 100%;
max-width: 280px;
display: block;
}
.inp * {
box-sizing: border-box;
}
.label {
position: absolute;
top: 16px;
left: 0;
font-size: 16px;
color: #9098a9;
font-weight: 500;
transform-origin: 0 0;
transition: all 0.2s ease;
}
.border {
position: absolute;
bottom: 0;
left: 0;
height: 2px;
width: 100%;
background: #0077ff;
transform: scaleX(0);
transform-origin: 0 0;
transition: all 0.15s ease;
}
</style>
<label for="inp" class="inp">
<input type="text" id="inp" placeholder="&nbsp;" />
<span class="label">Label</span>
<span class="border"></span>
</label>

头部

布局用的float, 周围的空白用的 padding, text-indent控制。

1
2
3
4
5
6
7
8
9
10
11
12
13
14
15
16
17
18
19
20
21
22
23
24
25
26
27
28
29
30
31
32
33
34
35
36
37
38
39
40
41
42
43
44
45
46
47
48
49
50
51
52
53
54
55
56
57
58
59
60
61
62
<style data="wrap背景阴影">
.wrap {
position: absolute;
background: #fdfdfd;
border: 1px solid #e8e8e8;
box-shadow: 1px 2px 3px #ddd;
}
</style>
<style data="hd年月份">
.hd {
padding: 10px 0;
height: 30px;
line-height: 30px;
}
.date-year {
font-size: 28px;
text-indent: 10px;
text-decoration: none;
float: left;
}
.year {
color: #ddd;
}
.m {
color: #888;
margin-left: -5px;
}
.arrow {
width: 50px;
margin-right: 10px;
float: right;
font: 500 26px sans-serif;
color: #ddd;
}
.prev {
cursor: pointer;
float: left;
}
.next {
cursor: pointer;
float: right;
}
</style>
<div class="wrap" style="width: 280px;">
<div class="content">
<div class="date">
<div class="hd">
<a href="javascript:;" class="date-year">
<span class="year">2019/</span>
<span class="m">10</span>
</a>
<div class="arrow">
<span class="prev"><</span>
<span class="next">></span>
</div>
</div>
<div class="ct"></div>
</div>
<div class="month"></div>
</div>
<div class="info"></div>
</div>

主体

注意拥有float属性的元素的父元素需要加个宽度
date picker 主体

1
2
3
4
5
6
7
8
9
10
11
12
13
14
15
16
17
18
19
20
21
22
23
24
25
26
27
28
29
30
31
32
33
34
35
36
37
38
39
40
41
42
43
44
45
46
47
48
49
50
51
52
53
54
55
56
57
58
59
60
61
62
63
64
65
66
67
68
69
70
71
72
73
74
75
76
77
78
79
80
81
82
83
84
85
86
87
88
89
90
91
92
93
94
95
96
97
98
99
100
101
102
103
104
105
106
107
108
109
110
111
112
113
114
115
<style data="ct主体">
.week {
color: #888;
}
ul,
ol,
li {
list-style: none;
padding: 0;
margin: 0;
}
html {
font: 500 14px 'roboto';
color: #333;
}
.wrap li {
position: relative;
float: left;
text-align: center;
border-radius: 50%;
width: 40px;
height: 40px;
line-height: 40px;
}
.items > li {
width: 280px;
}
.old {
color: #888;
}
.now {
color: #fff;
background: #66be8c !important;
}
.new {
color: #888;
}
</style>
<div class="wrap" style="">
<div class="content">
<div class="date">
<div class="hd">
<a href="javascript:;" class="date-year">
<span class="year">2019/</span>
<span class="m">10</span>
</a>
<div class="arrow">
<span class="prev"><</span>
<span class="next">></span>
</div>
</div>
<div class="ct">
<ol class="week">
<li>Sun</li>
<li>Mon</li>
<li>Tue</li>
<li>Wed</li>
<li>Thu</li>
<li>Fri</li>
<li>Sat</li>
</ol>
<ul class="items">
<li>
<ol class="days">
<li class="old">29</li>
<li class="old">30</li>
<li>1</li>
<li>2</li>
<li>3</li>
<li>4</li>
<li>5</li>
<li>6</li>
<li>7</li>
<li>8</li>
<li>9</li>
<li>10</li>
<li>11</li>
<li>12</li>
<li>13</li>
<li class=" now">14</li>
<li>15</li>
<li>16</li>
<li>17</li>
<li>18</li>
<li>19</li>
<li>20</li>
<li>21</li>
<li>22</li>
<li>23</li>
<li>24</li>
<li>25</li>
<li>26</li>
<li>27</li>
<li>28</li>
<li>29</li>
<li>30</li>
<li>31</li>
<li class="new">1</li>
<li class="new">2</li>
<li class="new">3</li>
<li class="new">4</li>
<li class="new">5</li>
<li class="new">6</li>
<li class="new">7</li>
<li class="new">8</li>
<li class="new">9</li>
</ol>
</li>
</ul>
</div>
</div>
<div class="month"></div>
</div>
<div class="info"></div>
</div>

交互事件阶段

####

插件改写阶段

css 命名空间

没有采用前缀限制, 好奇css module里的类名, 所以玩玩, 探索一下。一激灵, 写成了用webpack打包的样子, 虽然还是能将生成的main.js引入html来达到想要的效果, 但是这已经和jquery 没关系了, 所以还是回到正道上吧


jquery 学习思考

见识过不少东西, 也写过一些东西后。开始学习别人的写法, 从最佳实践, 代码组织, 到语言特性, 设计模式。

关于学习别人,

  1. 分析结构, 编写简易版本(构建骨架模拟操作, 剩下的只需要添加功能完善)
  2. 了解工作流, 扩展增强它

基础结构

这部分引用的是 jQuery 在 github 上的仓库,使用的模块管理是 requirejs (与 nodejs 中的 require 不是一个规范) 下面的链接是大概位置, 顺序大概是打包后的。如果想搜索相关的代码, 可以利用 github 的仓库内寻找, 能查找文件内容, 很方便

  1. 立即执行函数 , 构建jQuery同时兼容node环境
  2. 全局通用变量与函数 , 方便使用
  3. init函数 , 原型链
  4. extend , 为jQuery添加新函数
  5. sizzle 函数
  6. callbacks 函数
  7. Deferred promise
  8. Data 数据缓存
  9. queue 队列操作: 执行顺序
  10. attr 元素属性操作
  11. CSS 操作
  12. event 操作, on 与 off 函数
  13. DOM&CSS 操作
  14. animation tween 函数
  15. Ajax 操作
  16. dimension 位置与尺寸
  17. noconflict 操作

然后简单介绍一下 requirejs 的 amd 规范, 这与前端模块化有关, 采用异步加载, 详细的看(现在没见谁用过= =)

1
2
3
4
5
6
7
8
9
10
11
12
//主模块 main.js
require(['A','jquery'],function(a,$){
//code here
})
//其他文件 定义依赖 jQuery 的模块
define(['jquery'],function($){
return $
})
//test.js 文件中 定义模块 test
define(function(){
return 'test'
})

实现细节

立即执行闭包

对外只返回出一个 jQuery 与 $ 对象, 不污染全局变量。闭包主要作用, 让函数执行完后的变量仍可被引用, 延长生命, 当然这里并不构成闭包, 下面模块与浏览器兼容里的才是(必须要返回函数或者setTimeOut等, 总结一下就是稍后在外部会执行)

1
2
3
4
5
6
7
8
9
(function(global,factory){
//some code
factory(global)
})(window,function(window, noGlobal){
//也是 some code
if (!noGlobal) {
window.jQuery = window.$ = jQuery;
}
})

import 与浏览器兼容

根据传入的 global 与 module 判断环境, 再选择执行模式

1
2
3
4
5
6
7
8
9
10
11
12
13
14
15
16
17
18
19
20
(function(global,factory){
if (typeof module === 'object'){
module.exports = global.document
? factory(global, true) //就不会有 window.xxx 的绑定了, 而只是返回 jQuery
: function(w) {
if (!w.document) {
throw new Error('jQuery requires a window with a document');
}
return factory(w);
};
}else{
factory(global) //没有 module 的话直接运行
}
})(window,function(window, noGlobal){
//还是 some code
if (!noGlobal) {
window.jQuery = window.$ = jQuery;
}
return jQuery
})

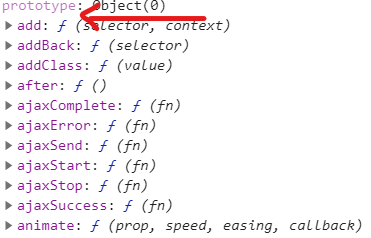
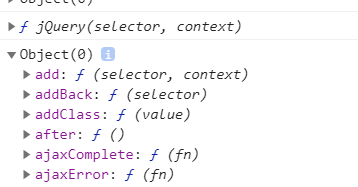
jQuery 与 jQuery.fn

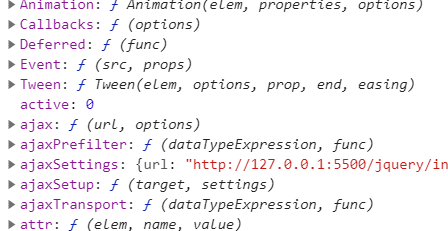
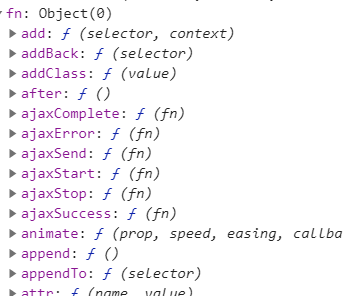
jQuery.fn 的方法需要进行初始化, 而直接在jQuery上写定的方法则可以直接使用 $.ajax 来执行

jQuery上的方法

jQuery.fn上的方法

1
2
3
jQuery.fn = jQuery.prototype = {
//some code
}

jQuery原型链

无 new 返回对象

没有使用 new 却构造出了新的对象, 通过原型链让 init 的对象能使用jQuery原型方法, 另外 jQuery 可以通过不同的 selector 创建对象

1
2
3
4
5
6
7
8
9
10
11
12
13
14
15
16
jQuery = function(selector, context) {
return new jQuery.fn.init(selector, context);
}
jQuery.fn = jQuery.prototype = {}
// some code
init = (jQuery.fn.init = function(selector,context,root){
context = context?context:window.document
var elem = context.querySelectorAll(slector)
if(elem.length !== 0){
elem.forEach((i,ind)=>{this[ind]=i})
}
this.length = elem.length
return this;//
})
//让这样创造的对象能使用jQuery原型方法的关键
init.prototype = jQuery.fn;

jQuery 的 extend 方法

为jQuery添加方法, 分为jQuery.extend与jQuery.fn.extend,一个给本身一个给原型链, 原理是调用的时候 this 是不同的

1
2
3
4
5
jQuery.extend = jQuery.fn.extend = function() {
for (name in arguments[0]) {
this[name] = arguments[name]
}//然后完善的话, 1.多个参数重载2.深复制3.防止bug如有环
}
jQuery.js
1
2
3
4
5
6
7
8
//some code
length = arguments.length,
deep = false;
console.dir(this) //打印一下就知道了
// Handle a deep copy situation
if (typeof target === 'boolean') {
deep = target;
//some code

一个是jQuery本身, 一个是它的原型对象

比较核心(想写)的方法

dom 操作

这里用其他几个函数包装了一个私有函数, 通过传入的回调函数不同实现不同的功能, 姑且就叫回调包装吧, 函数 domManip 的主要功能就是添加 DOM 元素, 由添加的位置不同而提供了四个公开函数 append、prepend、before、after, 同时还可以执行脚本, 对字符串还会解析为节点, 如果是 script:src 会远程下载后执行

1
2
3
4
5
6
7
8
9
10
11
12
13
14
15
16
17
18
19
20
21
22
jQuery.fn.after = function(){
return domManip(this, aruguments, function(e){
if(this.parentNode){
//此处的 this 从后文可以看出是一个dom元素
this.parentNode.insertBefore(e, this.nextSibling);
}
})
}
//args 假定只有一种类型
function domManip(collection, args, callback){
//这是个私有函数
var args = concat.apply([], args),
length = collection.length
if(length > 1){
collection.forEach(i=>{
domManip(i, args, callback)
})// 为了链式调用的返回
return collection
}else{
callback.call(collection[0], args);
}//后续1.参数判断2.脚本执行
}

attr 操作

很多有关属性的操作包括css()方法都是依靠这么一个私有函数 access 来实现的, 从注释上可以看出, 这是一个对集合元素进行get 或 set 操作的多功能方法, 当然主要功能还是传入的回调函数 fn 来实现

1
2
3
4
5
6
7
8
9
10
11
12
13
14
15
16
17
18
19
20
21
22
23
24
25
26
27
28
29
30
31
32
jQuery.fn.css = function(name, value){
return access(
this, function(elem, name, value) {
//后续写在插件部分里, 不然这里太长了
return value !== undefined ?
jQuery.style(elem, name, value):
jQuery.css(elem, name);
}, name, value);
}
jQuery.fn.attr = function(name, value){
//jQuery.attr 只是为了近似jQuery的写法(照抄过来的)
return access(this, jQuery.attr, name, value);
}
jQuery.attr = function(elem, name, value){
if(value === undefined){
return elem.getAttribute(name)
}
elem.setAttribute(name, value + '');
return value;
}
function access(elems, fn, key, value){
var len = elems.length
// set
if(value != undefined){
for (; i < len; i++) {
fn(elems[i], key, value);
}
return elems
}
// get
return fn(elems[0],key) // jQuery 只会返回第一个的属性值
} //后续1.参数重载(判断参数类型得到不同的执行过程)

基本上一个开源项目有不少内容都是后续向下兼容或者功能添加完善上去的, 可以学习一下代码结构和运行流程与原理, 至于模块组织, 现阶段我觉得都差不多, 不知道requirejs 淘汰的原因(也许也没淘汰?只是es6让他不再属于这个时代)


参考文章:

jQuery源码分析系列

前端JQuery系列

jQuery 3.0的domManip浅析


prototype new

new

首先来讲 new , 这个关键词主要就是用在创建类或函数的实例上的。当然, 类其实是构造函数的语法糖, 让语言的表达更直观。

new 的操作流程如下:

  1. 创建空的 JavaScript 对象, Object.create(null)
  2. 指定构造函数, 绑定原型链, obj.__proto__ = Func.prototype
  3. 绑定obj为this后运行 Func.call(obj,arguments) 获得返回值
  4. 判断返回值是否为对象, 否定的话返回构造的对象, 肯定的话返回既定返回值

具体可以看

阅读更多
this,apply,call

什么是 this

this 首先是一个对象(在严格模式下也会是 undefined),当然在 MDN 中也被形容为当前执行代码的环境对象。这么称呼的原因和函数的调用有关系,例如:

1
2
3
4
5
6
function test(name) {
console.log(this)
console.log(name)
}
test('123')
test.call(undefined,'123')
阅读更多
Hello World

Welcome to Hexo! This is your very first post. Check documentation for more info. If you get any problems when using Hexo, you can find the answer in troubleshooting or you can ask me on GitHub.

Quick Start

Create a new post

1
$ hexo new "My New Post"

More info: Writing

Run server

1
$ hexo server

More info: Server

Generate static files

1
$ hexo generate

More info: Generating

Deploy to remote sites

1
$ hexo deploy

More info: Deployment